

A strong product is only half the battle on Amazon. If shoppers can’t find your listing, or they land on it and leave unconvinced, even a great product will struggle. This Amazon listing optimization checklist walks you through the 12 checks we run on every listing, from keyword research to images and backend fields, so you can improve both visibility and conversion without guesswork.
Work through it in order. Each step builds on the one before, and most sellers find at least three or four quick wins the first time they go through it.
Why Amazon Listing Optimization Matters
Amazon’s search engine decides which products appear for a query based on relevance and performance. Relevance comes largely from the words in your listing. Performance comes from how shoppers behave once they see it: whether they click, add to basket and buy. A well-optimised listing helps on both fronts. It tells Amazon exactly what you sell, and it gives shoppers enough clarity and confidence to purchase.
The opposite is just as true. A vague title, thin bullets or poor images can quietly hold back sales for months, and advertising spend won’t fully fix a listing that doesn’t convert.
Part 1: Keywords and Research
1. Build a keyword list before you write anything
Start with the words real shoppers type. Use Amazon’s own search bar suggestions, competitor listings and a keyword research tool to collect search terms, then group them by intent: core product terms, feature terms, use-case terms and audience terms. Keep the list in a spreadsheet so you can track where each keyword ends up. If you need help with this stage, our Amazon product research service covers keyword and market analysis.
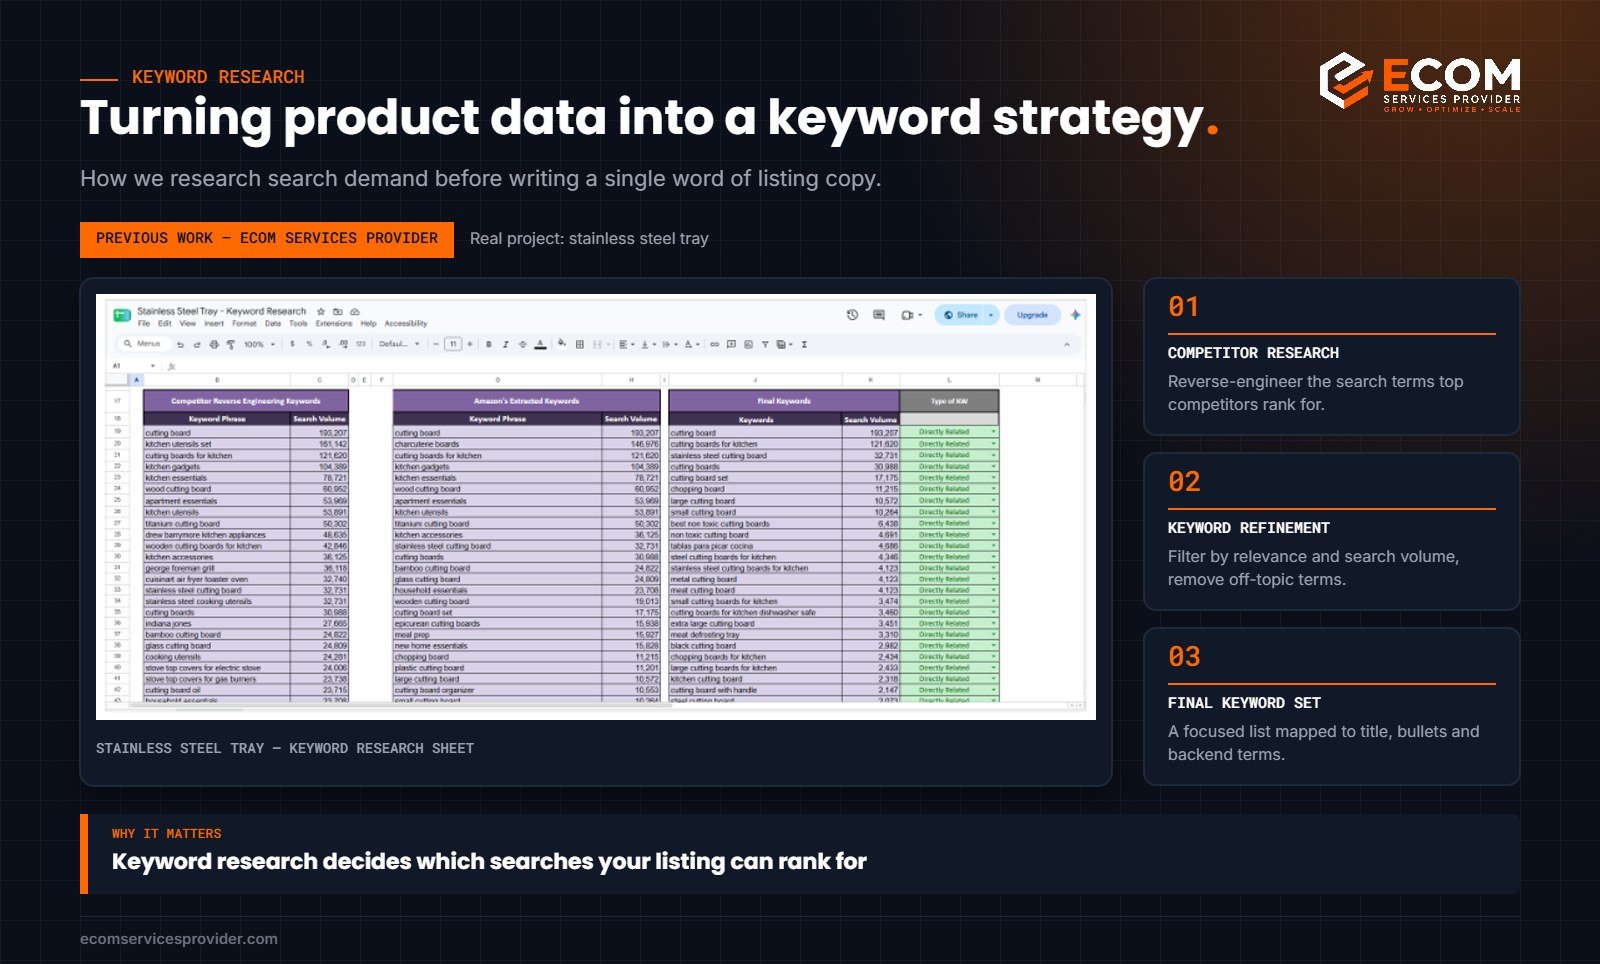
How we do it at ECOM Services Provider: every project starts with a three-stage sheet. First we reverse-engineer the keywords competing listings rank for, then we pull Amazon’s own suggested and extracted search terms, and finally we keep only the terms that directly describe the product, each one tagged by relevance and search volume. That final list is what the copy is written from.
2. Prioritise by relevance first, volume second
A high-volume keyword that doesn’t truly describe your product will attract clicks that don’t convert, which can hurt rankings over time. Rank your list by how accurately each term describes the product, then by search volume. Your most relevant, highest-volume terms belong in the title.
3. Check what is already ranking
Search your main keywords and study the first page. Note common title structures, the features competitors highlight, the questions in their reviews and any gaps you could fill. This tells you what shoppers expect to see and where you can stand out.
Part 2: Title, Bullets and Description
4. Write a clear, compliant title
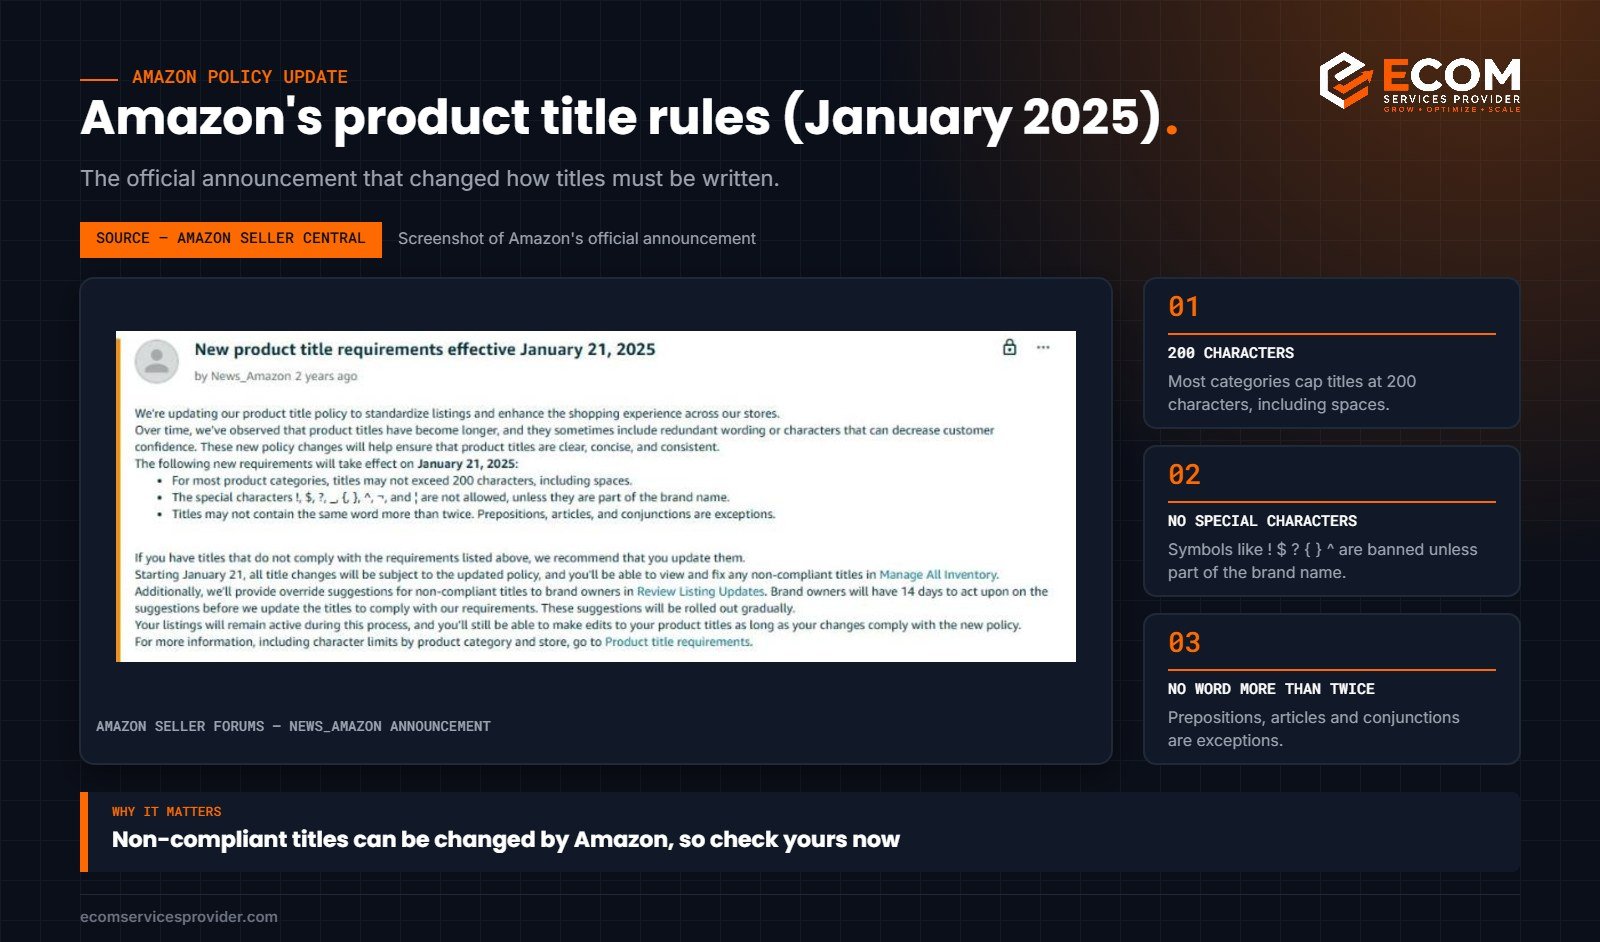
Lead with your brand and the core product term, then add the most important attributes: size, material, quantity, colour or model. Amazon tightened its title rules in January 2025. For most categories titles are capped at 200 characters including spaces, many special characters are banned unless they form part of a brand name, and the same word should not appear more than twice. Always check the style guide for your category, as some have shorter limits.
A readable title beats a keyword-stuffed one. Shoppers on mobile see only the first part, so put the essentials up front.
5. Turn bullets into benefits
Use your bullet points to answer the questions a shopper would ask before buying. Start each bullet with a short benefit-led phrase, then support it with the specific feature or detail that proves it. Cover what the product does, what it is made of, dimensions or compatibility, what is in the box, and how to use or care for it. Work in secondary keywords naturally, but write for people first.
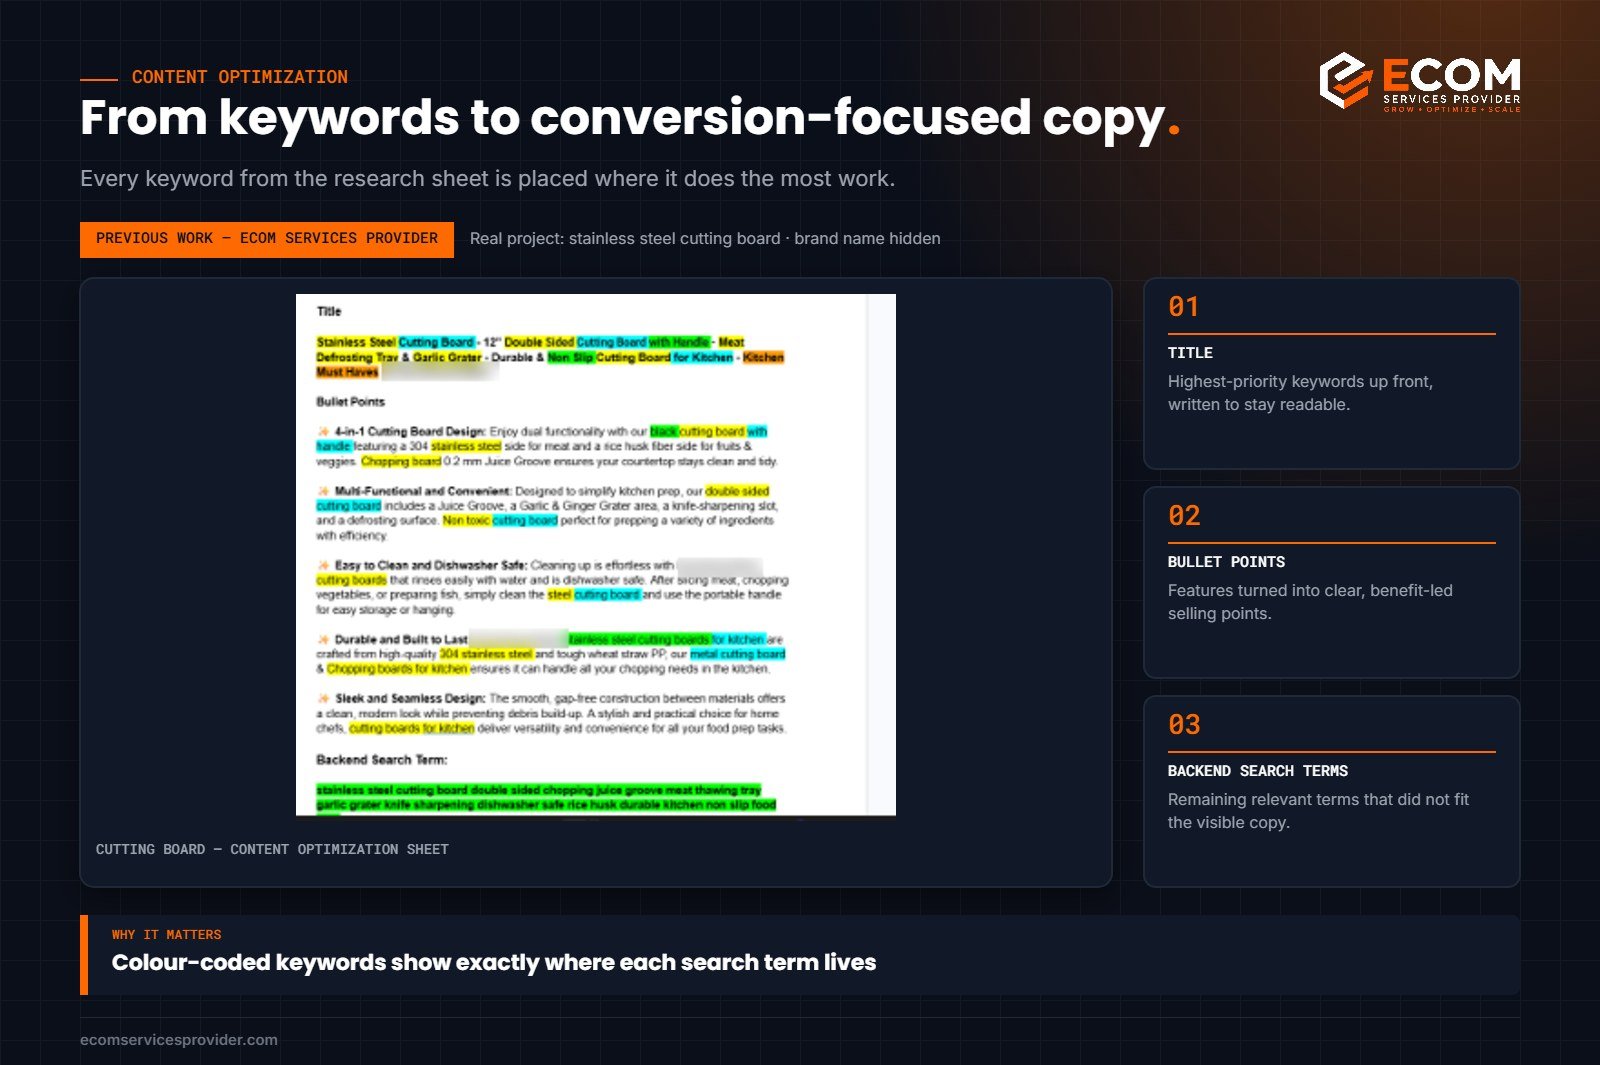
In our content sheets, every keyword is colour-coded so you can see at a glance where each search term from the research appears: in the title, in a bullet or in the backend field. Nothing is guessed, and nothing important is left out.
6. Use the description for detail and context
If your brand isn’t yet using A+ Content, the product description is where you can expand on use cases, explain technical details and answer remaining objections. Keep paragraphs short and scannable. Once A+ Content is live, it usually displays in place of the plain description on the detail page, but the description text is still worth completing accurately.
7. Avoid claims you can’t support
Amazon restricts unsupported claims, such as medical benefits, “best seller” wording or guarantees that aren’t backed up. Remove anything that could trigger a listing quality issue or a policy warning. Accuracy also reduces returns and negative reviews, which protects your account health.
Part 3: Images and Visual Content
8. Meet the main image requirements
Your main image must show the product on a pure white background, without added text, logos or watermarks, and the product should fill most of the frame. Upload high-resolution images (at least 1,000 pixels on the longest side) so the zoom feature works, which shoppers rely on to inspect details.
9. Use secondary images to sell
Treat your additional image slots as a visual sales pitch. A good set usually includes lifestyle images showing the product in use, an infographic highlighting key features, a dimensions image with clear measurements, a “what’s in the box” image and a close-up of materials or finish. Add a short video if your category allows it. Our product graphics team designs image stacks built around this structure.
10. Add A+ Content if you are brand registered
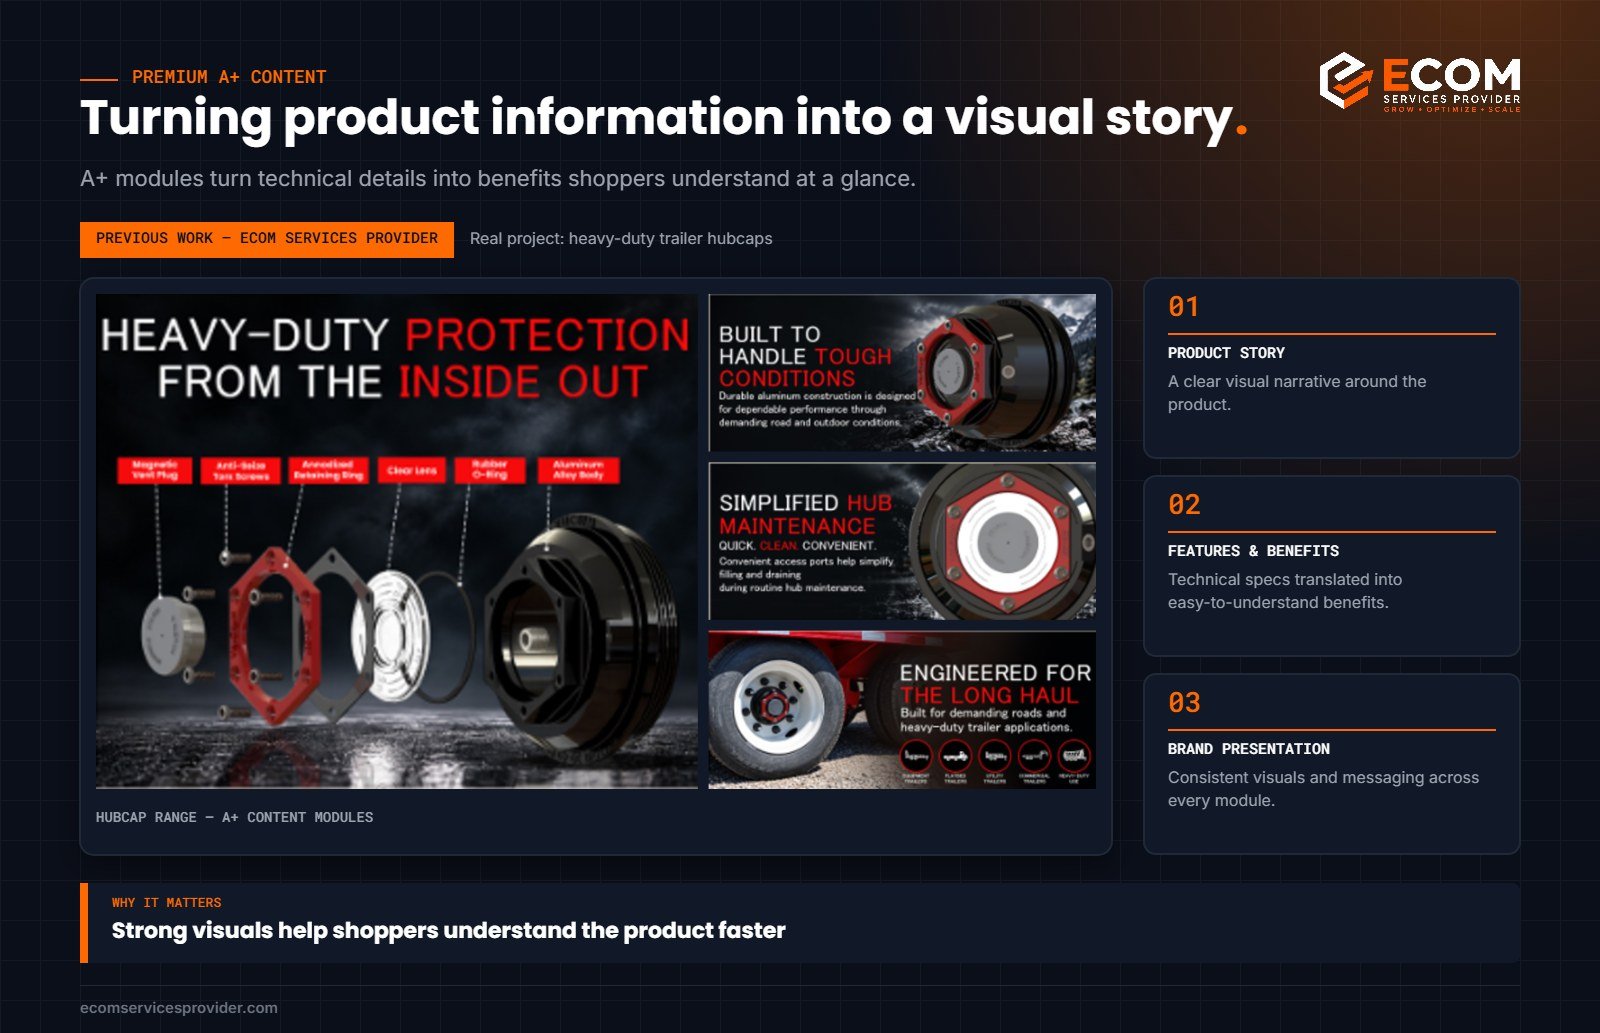
Brand owners enrolled in Amazon Brand Registry can add A+ Content, the enhanced section with images, comparison charts and richer brand storytelling. It helps shoppers understand the product faster and lets you cross-sell your range through a comparison chart. Learn more on our Amazon A+ Content page.
Part 4: Backend and Ongoing Checks
11. Complete backend search terms and attributes
The backend search terms field lets you add relevant keywords shoppers won’t see. In the US marketplace the limit is 249 bytes, and Amazon may ignore the field if you exceed it. Use it for synonyms, alternative spellings and terms that didn’t fit naturally elsewhere, without repeating words already in your title or bullets and without competitor brand names. Also fill in every relevant attribute (material, size, colour, target audience and so on), because Amazon uses attributes for filters and search refinements.
12. Review, measure and refine
Optimisation is not a one-off job. After changes go live, give them time to settle, then review your Business Reports for sessions and unit session percentage (conversion rate), check your search term reports if you advertise, and read new reviews for recurring questions or complaints. Update the listing whenever you learn something new about how shoppers search for or use your product.
A Quick Summary Checklist
- Keyword list built and grouped by intent
- Keywords prioritised by relevance, then volume
- First-page competitors reviewed for gaps
- Title compliant with current rules and readable on mobile
- Five benefit-led bullets with supporting detail
- Description complete and scannable
- Unsupported or restricted claims removed
- Main image compliant and high resolution
- Secondary images covering lifestyle, features, dimensions and contents
- A+ Content live (if brand registered)
- Backend search terms within the byte limit, attributes complete
- Performance reviewed and listing refined regularly
For Amazon’s own guidance on product detail pages, see the Sell on Amazon resources.
Frequently Asked Questions
How often should I update my Amazon listing?
Review it at least every few months, and whenever you see a drop in conversion rate, new recurring questions in reviews, or changes in what competitors offer. Avoid changing everything at once, so you can tell which edit made a difference.
How long does it take for listing changes to affect rankings?
Edits usually go live within a day, but ranking and conversion effects can take a few weeks to show clearly. Track your sessions and conversion rate over a consistent period before and after the change.
Should I put every keyword in the title?
No. Put the most relevant, highest-priority terms in the title and spread secondary keywords across the bullets, description and backend search terms. A cluttered title can reduce clicks and may breach Amazon’s title rules.
Do I need Brand Registry to optimise my listing?
You can optimise titles, bullets, images and backend terms without it. Brand Registry unlocks extras such as A+ Content, a Brand Store and stronger control over your listings.
Need a Hand With Your Listings?
At ECOM Services Provider we have 8+ years of eCommerce and Amazon experience and have completed 768+ projects for sellers across Amazon marketplaces worldwide. If you would like an expert to review and optimise your listings, take a look at our Amazon listing optimization service or book a free consultation to talk through your products.